Showing posts with label how to get insurance. Show all posts

Monday, November 6, 2017

How to Clean Your House Fast: 11 Efficient House Cleaning Tips


Everyone hates to clean but everyone loves a clean house. Is there a best way to clean your house fast?
Most novices aren’t sure if they should dust or vacuum first. They wonder whether they should clean the kitchen before the bathroom or vice versa.
Follow this step-by-step guide, based on years of hard-earned experience, to make the most of your time and clean your house fast:

1. Clean the whole house, not one room at time

Cleaning is much more efficient if you pick one task (dusting, vacuuming, mopping) and do the same task in every room in the house, rather than cleaning the kitchen, the bathrooms and then the bedrooms. Doing it that way prevents you from feeling like you’re in an endless cleaning cycle, starting the same task over and over again.

2. Gather all your cleaning tools in a caddy

Whether it’s a caddy, bucket or tote, having everything you need to clean in one portable place makes it much easier to get the job done. You won’t waste time looking for tools while you clean, and don’t have to worry about gathering them before your next go around.

3. Clear the clutter

Before you even start cleaning, go room to room and pick up the clutter. As you pick up each item – magazines, well-read paperbacks, old sneakers – consider whether you should put it away, toss it or donate it.

4. Dust and vacuum

Before you start dusting, make sure ceiling fans are turned off. Concentrate your dusting on the tops of furniture and the undersides of shelves, on handrails, picture frames, knickknacks and TV screens. For hard-to-reach areas, like blinds and upper shelves, tie a microfiber cloth to the end of a mop or broom. Change the sheets in the bedrooms before you vacuum.

5. Wipe mirrors and glass

Use one damp microfiber cloth, followed by one dry cloth in wiping clean all the mirrors and glass surfaces.

6. Disinfect countertops and surface areas

Go through your house and wipe down the hard surfaces – from countertops, appliances and cabinets to doorknobs, light switches, TV remotes and telephones. You should disinfect some of those surfaces, particularly the ones that might deliver germs to people’s fingers and faces. Make a nontoxic disinfection solution by mixing one-fourth to a half cup of white or apple cider vinegar with a cup of water.

7. Focus on tubs, sinks and toilets

Spray cleaner on the kitchen sink then on bathroom sinks, tubs and toilets. Let it sit for a few minutes so the cleaner has time to dissolve dirt and stains. Then return to the kitchen and start scrubbing. Don’t forget to wipe down the inside of the microwave. Clean toilets last.
While in the kitchen, you also want to make sure your garbage disposal is in tip-top shape. If you aren’t sure the best way to clean a garbage disposal, click herefor some useful DIY garbage disposal cleaning tips.

8. Sweep, then mop

Sweep the kitchen and bathroom floors. Start mopping from the farthest corner of the room and move backwards towards the doorway (that is, don’t mop yourself into a corner). Rinse the mop every time you complete a 4-by-4-foot area.

9. Keep moving when you vacuum

Don’t worry about getting every nook and cranny when you vacuum. Just keep moving through the house, running the vacuum in every carpeted room in one pass through.
Some tasks don’t need to be done each week. These include waxing the furniture, cleaning the windows, and washing area rugs and bath mats. Inspect these accessories and use your own judgment.

10. Don’t forget to routinely wash your cleaning tools

An often overlooked part of cleaning the house is maintaining your cleaning tools. Using a dirty mop or a vacuum with a full bag is much less effective, and you’ll end up spending more time trying to clean.

11. Make cleaning a group activity

Making cleaning a team effort is one of the best ways to clean a house fast. Schedule a time in advance with your family, and assign tasks to each person. Working together can add some fun to cleaning, and your house will be sparkling in no time.
Now that your home is spotless, it’s time to move onto your car. Check out our expert tips on how to detail your ride with a DIY car wash.

Thursday, November 2, 2017

How Much Air Should You Put in Your Tires?

recommended tire pressure
Tire maintenance is one of the most important things you can do for your car from a safety and cost standpoint. The easiest way to care for your tires is both quick and inexpensive: maintain the correct tire pressure.
Driving on under-inflated tires is one of the biggest causes of tire failure, according to the National Highway Traffic Safety Administration, and under-inflated tires present many other problems. They wear out more rapidly, handle poorly and reduce fuel efficiency. In addition, over-inflated tires are more susceptible to damage from road irregularities, and this also creates a bumpier ride. Overfilling your tires is just as dangerous as under-filling them, so it’s important you know what is recommended for your vehicle.

Determining your tire pressure requirements

Since tire pressure is so important to your safety and your car’s overall performance, it’s important to know what tire pressure is right for your vehicle. Air pressure in tires is measured in pounds per square inch, or PSI; usually, the recommended pressure ranges between 30 and 35 PSI.
To learn what your tire pressure should be, look for your manufacturer’s recommendation, which is printed on a label inside your car. Depending on the vehicle, this label may be on the edge of the vehicle’s door, on the doorpost or in the glove box. The label will usually give recommendations for the front and rear tires as well as the spare, and it’s important you stick to those guidelines. (While you’re at it, check the air in your spare tire, too. It loses air pressure over time.) Even after you’ve replaced your tires, the same pressure guidelines on your car’s label apply to new tires of the same size. If your tires are larger than the stock models that came on your car and you’re unsure of the recommended PSI, check the tire’s sidewall to find the maximum cold PSI level.
Pressure recommendations are based on readings taken from Check the pressure first thing in the morning or wait at least three hours after driving; this provides sufficient time for them to cool back down.

Maintaining ideal tire pressure

Of course, knowing your recommended PSI isn’t enough. You have to ensure you’re checking your tires regularly. Some experts recommend you check the air pressure every time you refuel; others say once a month is sufficient. Monitoring the amount of air in your tires will let you know if you have a small leak and can help you avoid an unexpected flat tire.
Frequently checking your PSI becomes even more important in the fall and winter, when outside temperatures drop and weather conditions fluctuate causing your tires to lose air more quickly. Generally speaking, your tire will gain or lose one PSIfor every 10-degree change in temperature, which means if you have a sudden drop of 30 degrees, you could lose three PSI overnight. If your tires were already low, this could cause tire damage, steering problems or even a flat tire.
Knowing and maintaining the right air pressure is important to the safety and longevity of your tires. All it takes is a and a few minutes of your time.
Once you have the right tire pressure, make sure you also have the right coverage. Learn more about how Nationwide auto insurance can help protect you and save you money.

Tuesday, October 3, 2017

Tips for Downsizing Your Home

downsizing home
You recently sent your last child off to college and now you’re an empty nester. Or maybe you’ve decided to sell your home and move to a smaller house because you don’t need so much space. Perhaps you’re tired of paying thousands of dollars in utility bills every year and would gladly trade a bigger home for fewer expenses.
The first step to downsizing your home is to figure out what’s in your house, and then get rid of anything you no longer use.
But there’s so much to go through you don’t know where to begin. At this point it can seem like an overwhelming task. There are years of memories in your home and you don’t want to get rid of anything important.
The good news is; You don’t have to. Downsizing your home can be simple and, in the end, make your home feel more comfortable and cozy.
The following are a few tips on how to begin downsizing your home.

Evaluate each item and its meaning for you

According to lifestyle and business coach June Saruwatari, “one reason people keep items in their houses, even if they have no function, is because they’re tied to them for emotional reasons.” You should look at each item, one by one, and ask yourself if you need it, if you love it, if it serves a purpose and if it’s significant in your life.
“When you start consciously going through your stuff, knowing there’s an emotional connection, you’re going to feel better,” Saruwatari says.
It may be difficult to throw away your child’s old report cards from elementary school. But if she doesn’t want them and they don’t serve a purpose for you, it may be necessary in order to make some room. If you saved a necklace that means a lot to you, simply find a place to keep it that’s not in the way of anything else.

Move the items out of the area first

Before you start decluttering a room, take everything out of it. Adrienne Breaux of Apartment Therapy recommends doing this so that you can see how great the space will look when it’s free of clutter. It’ll be easier to get rid of things if you know what the end result will be.

Figure out an item’s value right now

Let’s say you paid $800 for a painting 15 years ago. But the painting sits in your basement and you have no plans to hang it up anytime soon. Why keep it? Even if something cost you a lot of money a long time ago, if it doesn’t have any value for you today, it’s not worth saving.
If you’re having trouble parting with anything that was once expensive, consider selling your goods online and/or having a garage sale. If all else fails, you can make donations to different organizations such as Goodwill and The Salvation Army and then claim a deduction on your tax forms.

Do a little bit of decluttering every day

You’re going to be overwhelmed if you decide to take a week and begin downsizing your home. You may not be aware of it now but it’s physically and emotionally taxing to get rid of things. Instead, take 20 minutes out of every day to sort through your possessions and decide what to do with them. It may take longer but you won’t experience as much stress as you would by doing it all at once.
Want to make your home spic and span ASAP? Check out these tips for cleaning your house in a hurry.

Scan papers and keep electronic files

It’s a waste of space to keep all your old papers around. File the important ones you need in a drawer such as birth certificates and family records and electronically catalogue the rest. Simply invest in a scanner or download an app like CamScanner or Genius Scan. You can take documents, hold them up to your cell phone to photograph and then upload them into your computer in a PDF format. Then, toss the papers. Voila — you’re free from paper clutter.
Downsizing your home can be a tedious task, but the payoff is worth it.
Make sure moving day runs smoothly with the ultimate moving checklist, which gives you step-by-step instructions up to 8 weeks ahead of moving day.

Saturday, January 7, 2017

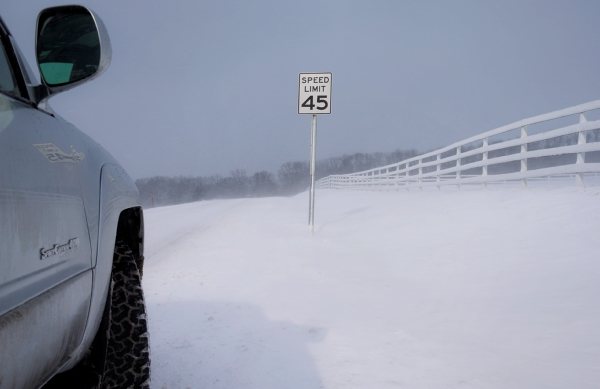
Tips for a Safe Winter Road Trip


Winter can be a popular time for a road trip, with families visiting friends and relatives for the holidays or driving to the mountains for fun in the snow. It’s also the time of year when road conditions are typically at their worst, requiring extra care before loading up the car and heading out. With some careful planning and cautious driving, though, you can make it safely to your destination.
Cold temperatures and wintry conditions can be tough on a car. You want your vehicle to be in the best working condition possible, which can go a long way toward avoiding trouble on the road.
Start by taking your car in for regular maintenance and service, including changing the oil to a weight, or viscosity grade, best suited for cold weather. A good mechanic will check your belts and hoses and make sure everything is in good shape and free of leaks. Check on whether you have enough coolant as well, and that it’s made for low temperatures.
“One of the most common winter driving woes is underinflated tires,” says Greg Cohen, president & CEO of American Highway Users Alliance. “Before taking a trip, check your tires and make sure they are inflated to the amount described in the driver’s door jamb. Also, check the condition of your wipers, have a full tank of wiper fluid, and check your oil.”
Visibility is vital in wintry weather, so use washer fluid designed for freezing conditions. “Pack an extra jug of winter wiper fluid, a strong flashlight with fresh batteries, and an ice scraper and snow brush,” Cohen says. Avoid driving on icy, slushy, or snowy winter roads, if possible.
It’s advisable to check your battery and get it load-tested. Cold temperatures can sap a weak battery’s ability to start your engine, a predicament you want to avoid. Other items to bring include an emergency road kit with flares or triangle reflectors, jumper cables and a first-aid kit. “Make sure you have at least a half tank of fuel, a bag of road salt, a fully charged mobile phone, a warm coat, winter gloves and hat, and warm clothing in case of a breakdown,” says Cohen.
It’s important to be aware of weather forecasts along your route and to stay on top of weather changes and road closings that can happen suddenly. Learn the different kinds of weather advisories from the National Weather Service. A “winter storm watch” is issued 12 to 48 hours in advance of a storm’s arrival with potential for heavy snow or ice, while a “winter storm warning” means a storm is occurring, or about to occur in your area usually within 36 hours. A “blizzard warning” means winds of at least 35 mph with heavy snow forecast for a period of 3 hours or more.
Once you’re out on the road, “be prepared for changing road conditions along road sections and from one road to the next,” says Cohen. “Expect road conditions to vary depending on the amount of congestion, type of pavement, and frequently changing maintenance jurisdictions. Use caution and steer carefully through turns. Bridges and ramps freeze before roadways, so be sure to avoid sudden speed changes and lane changes.”
The concentration needed for driving in wintry conditions can be exhausting, so stay alert and take plenty of rest breaks.
If possible, avoid driving on roads until they’ve been plowed and de-iced. On roads that have yet to be cleared, slow down, turn off your cruise control, and avoid sudden braking or acceleration and unnecessary stops. If you suddenly feel your tires have lost their grip on the road, stay calm and gently steer in the direction you wish to go without over-correcting. Keep a light touch on the steering wheel; a white-knuckle grip can lead to overreaction and loss of control.
When bad weather strikes while you’re driving, head for a service station or truck stop at the first chance and wait it out. But if you suddenly find yourself stranded on the side of the road, stay calm, put on your hazard lights and call 911. After,  you should also contact your insurance provider, they can provide additional help such as Nationwide’s Roadside Assistance.
“If it is safe to do so, make sure your car is visible to others by carefully placing emergency flares and/or reflective triangles a safe distance behind your car,” says Cohen. “Return to the warmth and safety of your car, call for a tow truck, and stay in your car until help arrives. Remember, the safest thing you can do is to stay in your car, only exiting when absolutely necessary to keep the vehicle visible to other drivers.”
By planning ahead, taking precautions while driving, and following safety steps in the event of a breakdown, your winter road trip can be a trouble-free time on the way to your destination.

Check out the original article right here...

Tuesday, November 15, 2016

5 Tips for Windshield Crack Prevention and Repair

5 Tips for Windshield Crack Prevention and Repair


All it takes is one small chip in the windshield before it becomes a full-fledged crack. Small yes, but you want to be safe. Here’s how to prevent a windshield crack from interfering with your safety.

1. Decide if it needs immediate attention

First, where’s the crack located? Is it off to the side or is it obscuring your view? If it interferes with your ability to see the road, you should deal with even a small crack immediately by taking your car to the repair shop. However, if it’s not really impairing your ability to see the road, grab a ruler.

2. Determine whether it needs repaired or replaced

If the crack is less than 12 inches long, or the chip is smaller than the size of a quarter, the integrity of the windshield hasn’t been compromised and probably doesn’t require replacing, according to Cars.com. But every crack or chip is different, and it’s important to consult an expert. The goal is to ensure a crack from getting bigger or in any way compromising safety.

3. Avoid dirt and debris

One of the biggest things to guard against is dirt. If dirt gets into the crack, it can make a simple repair much more complicated. But that doesn’t mean you should head for the car wash or reach for a bucket. If water seeps into the crack, what began as a small repair has now become a complete replacement. Instead, keep dirt and moisture away from the crack with a piece of clear packing tape, which is strong but won’t obscure your view.

4. Park indoors to avoid the sun

If possible, park the car inside, where it will be protected against rain as well as the sun, which can cause the windshield to heat up and allow the crack to expand. If you don’t have a garage, try parking in a shaded spot.

5. Avoid temperature extremes

Likewise, keep in mind that extreme cold is not good for the cracked windshield. Refrain from putting your air conditioner or defroster on high. If necessary, use the heater moderately to gradually defrost the windows.

6. Drive carefully

Another way to keep the crack from getting larger is to drive with extra caution. That means steering clear of potholes and staying away from rough roads. Jostling the car is the last thing that you need when driving with a crack, and you also want to be careful when getting in and out of the car and avoid slamming the doors or the trunk.
Above all, keep safety in mind at all times; the sooner you get the windshield in for replacement or repair, the better. Beyond repairing a cracked windshield, performing regular car maintenance is key to sustaining your car in the long term. Check out the ultimate car maintenance schedule and keep your ride up to date.